How to Fix an Outside Tap That Won't Work After Winter (UK Guide)
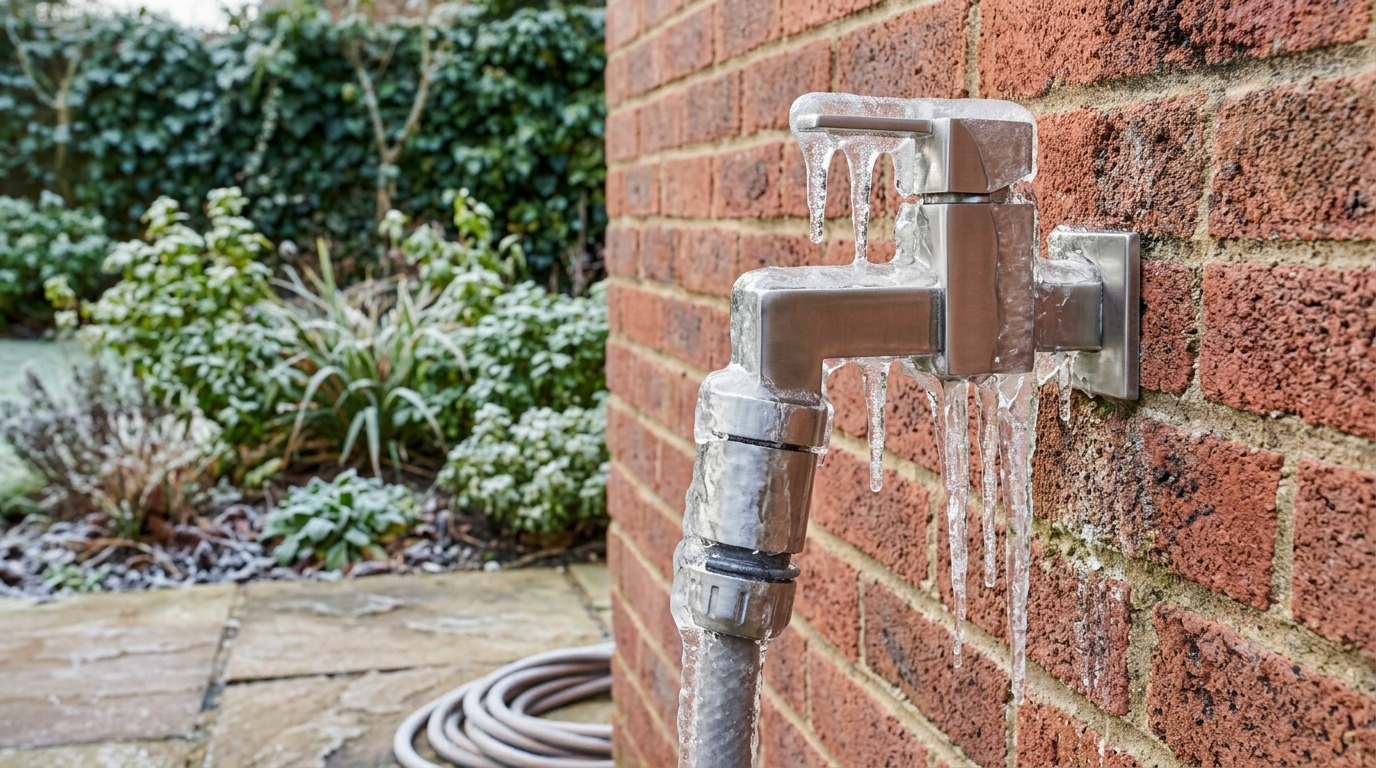
Here's how to fix an outdoor tap that won't work after winter, working through the five most likely causes in order of likelihood. It's a frustrating spring surprise: you head out to water the garden or clean the car, turn the handle on your outside tap, and get absolutely nothing — or a miserable trickle despite the valve being wide open.
In the UK, outdoor taps (also called garden taps or outside taps) bear the brunt of sub-zero winter spells. When water freezes inside a copper pipe or the tap assembly itself, it expands by roughly 9%. That expansion leads to jammed components, hidden splits, or a seized double check valve. Before calling an emergency plumber, most outside tap faults can be traced and fixed with basic DIY steps in under half an hour.
Quick symptom table: what's wrong with your outside tap?
Match your symptom to the most likely cause, then jump straight to the fix:
| Symptom | Most likely cause | Jump to fix |
|---|---|---|
| No water at all when you turn the handle | Indoor isolation valve still closed from autumn | Section 1 |
| Trickle only, or very weak flow | Seized double check valve | Section 3 |
| Handle turns freely but no water flows | Internal washer detached, blocking the seat | Section 4 |
| Handle won't move at all | Limescale and frost have locked the spindle | Section 4 |
| Damp patch on wall or floor near the pipe run | Hidden split from a burst pipe | Section 6 |
| Tap is brand new (under 2 years old) | Installation debris or valve fitted backwards | Section 5 |
A garden tap not working after winter is most often caused by one of five faults, in this order of likelihood:
- The indoor isolation valve is still switched off from being drained down for winter.
- The double check valve (non-return valve) has frozen or seized shut — the single most common cause reported by UK plumbers.
- Ice is still trapped inside the supply pipe or tap body.
- The internal washer or jumper has perished or jammed in the valve seat.
- A hidden split has opened in the pipe where it froze and expanded.
Work through the sections below in order — each check takes only a couple of minutes. If your tap is dripping or won't turn off, rather than refusing to run, that's a different fault — see our garden tap dripping or leaking guide instead.
Quick Navigation
- 1. The Forgotten Inline Isolation Valve
- 2. Dealing with Frozen Blockages & Airlocks
- 3. The Double Check Valve: The #1 Cause After Winter
- 4. Seized Handles & Stuck Internal Washers
- 5. Outside Tap Not Working on a New Build?
- 6. The Dry Wall Test: Checking for Splits
- 7. When to DIY and When to Call a Plumber
- 8. Essential Maintenance Tools
- 9. Cost to Fix or Replace an Outside Tap
- 10. Winter Proofing Your Outside Tap
1. The Forgotten Inline Isolation Valve
Before suspecting a mechanical failure, check whether the water supply was simply shut off before winter. Many homeowners isolate their external plumbing feeds around November and forget about it by spring — and this alone accounts for a huge share of "outside tap not working but stopcock is on" call-outs.
A 30-second sanity check first: turn on an indoor cold tap. If nothing in the house has any water, the fault isn't the outside tap — see our no water in the house (UK) guide. If it's specifically your kitchen cold tap that's also affected, check kitchen tap no water (UK), since the two often share the same isolation valve.
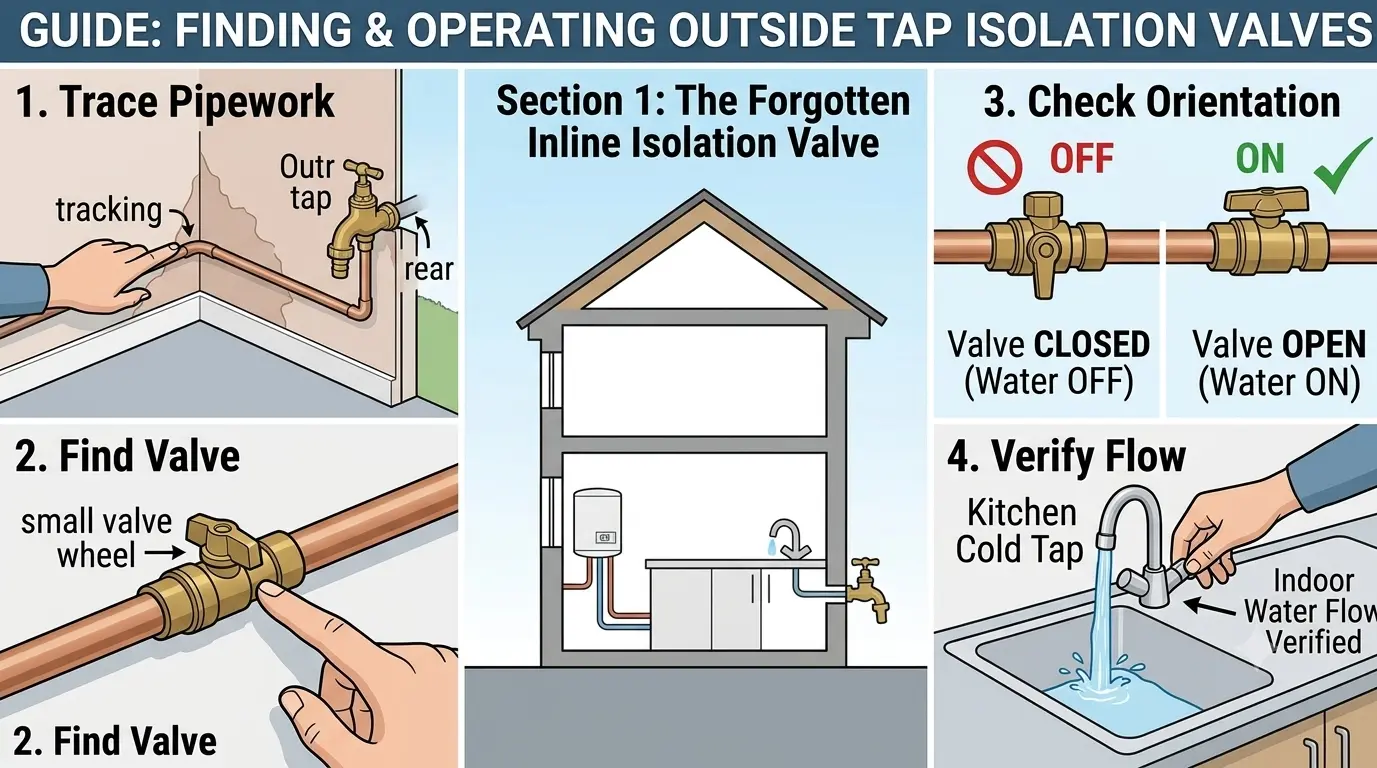
- Track the Pipework: Go inside your home directly behind where the outdoor tap is mounted (typically inside the kitchen sink base cabinet, utility room, or understairs cupboard). Follow the copper pipe backwards.
- Identify the Valve: Look for a small valve on the line. It will usually be a chrome service valve with a screwdriver slot, a red/blue plastic lever, or a brass thumb-turn wheel.
- Check the Alignment: If the slot or lever is sitting perpendicular (at a right angle) to the direction of the pipe, the water is Off. Use a flat-head screwdriver or your hand to turn it parallel to the pipe to restore the flow.
2. Dealing with Frozen Blockages & Airlocks
If the weather has only recently turned warmer, or if your tap sits on a north-facing brick wall that gets zero direct sunlight, ice may still be lingering deep inside the supply pipe.
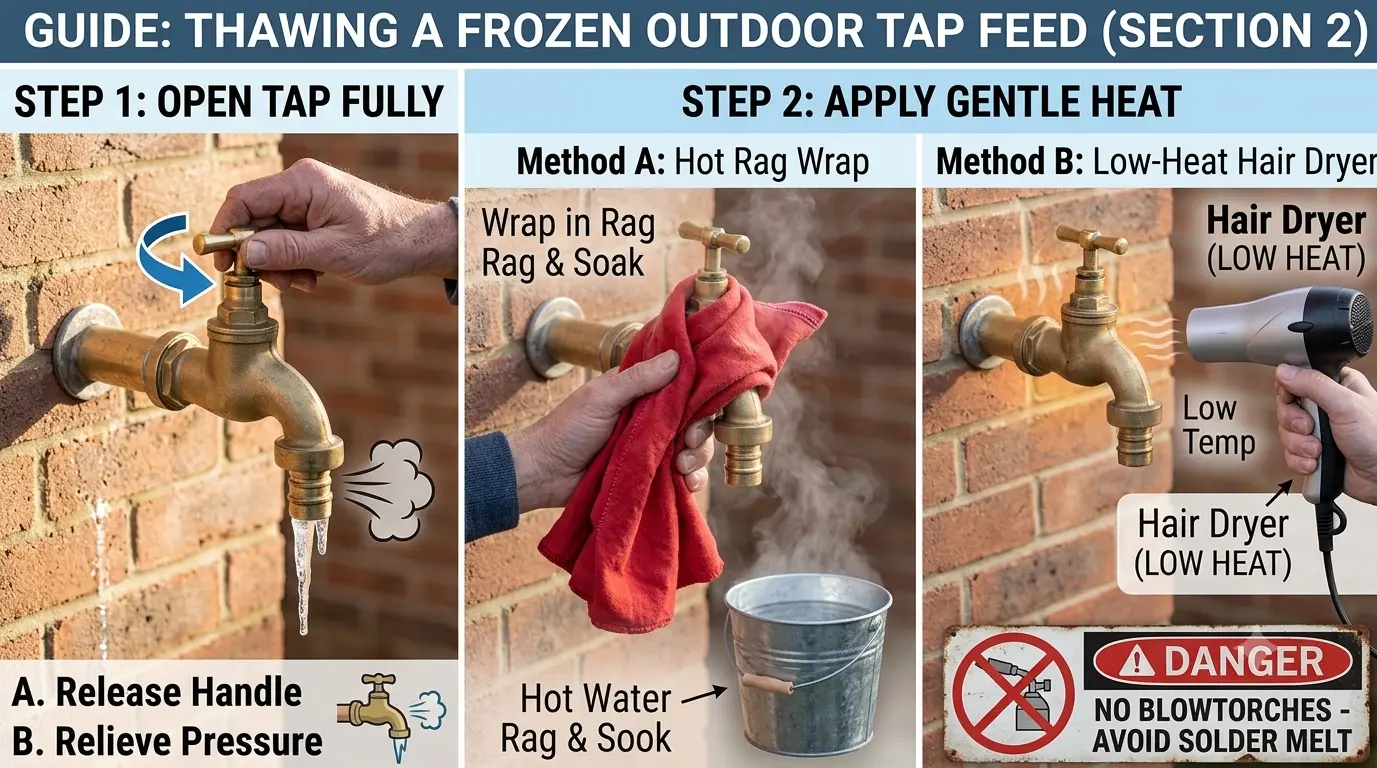
How to Safely Thaw the Feed
- Open the Tap Fully: Turn the tap head counter-clockwise. This releases built-up pressure as the ice melts.
- Apply Gentle Heat: Do not use a blowtorch — it can melt the solder joints on copper pipes or warp plastic MDPE fittings. Instead, wrap the tap in a rag soaked in hot water, or use a hair dryer on its lowest setting, working from the tap body back toward the wall.
3. The Double Check Valve: The #1 Cause After Winter
If the isolation valve is open and there's no obvious ice left in the pipe, this is where most outside taps actually fail. UK Water Regulations require every garden tap installation to include a double check valve (also called a non-return valve or DCV) to stop dirty hosepipe or pond water being siphoned back into the drinking water supply. It works using a small internal spring that snaps shut against backflow — and that spring, sitting in a narrow, water-filled channel, is exactly the kind of component that seizes solid the moment it freezes.
The double check valve is fitted in one of two places: built into the base of the tap itself (look for a small brass nut underneath the spout), or as a separate brass fitting on the pipe inside the house, close to the isolation valve.
How to Check and Free a Stuck Double Check Valve
- Isolate the water: Turn off the indoor isolation valve, or the main stopcock if there isn't a dedicated one.
- Remove the tap: Unscrew the outside tap from its wall plate with an adjustable spanner.
- Test the wall plate: With the tap removed, briefly turn the water back on. If it now flows freely from the wall plate, the fault is inside the double check valve or tap body, not the pipework.
- Clean or replace: If the DCV is built into the tap, replace the whole tap — they're inexpensive and not designed to be stripped down. If it's a separate inline valve, unscrew it, flush out any debris or ice crystals, and refit with fresh PTFE tape. Fit a new valve rather than reusing one with a corroded or sticking spring.
Only Getting a Trickle Instead of No Water at All?
A double check valve that's partially, rather than fully, seized is the most common cause of a garden tap that dribbles instead of flowing properly. Run the same removal test above: if pressure returns to normal once the tap is off the wall plate, replace the valve or tap. If pressure is still weak everywhere else in the house too, the cause sits elsewhere in your system — see our guide to fixing low water pressure upstairs, or, if it's specifically the shower that's lost pressure, low water pressure in the shower (UK).
4. Seized Handles & Stuck Internal Washers
If the handle turns freely but no water comes out, or if the handle is entirely seized solid, the problem lies within the brass tap mechanism itself. Freezing conditions often cause the internal rubber washer to fuse itself to the brass seating.
If the Handle Turns Freely but No Water Flows
The Cause: The internal jumper component and its rubber washer have detached from the spindle and are stuck tightly inside the valve seat, blocking the water passage completely.
The Fix: Turn off the water inside. Grip the tap body with an adjustable spanner, use a second spanner to unscrew the tap bonnet, pull out the internal mechanism, and replace the rubber washer.
If the Handle is Completely Seized
The Cause: Limescale build-up combined with winter frost has locked the internal brass threads together.
The Fix: Spray a generous amount of penetrating oil (like WD-40) directly around the handle spindle. Let it sit for 15 minutes, then gently tap the tap body with a wrench to break the scale lock before attempting to turn it again.
5. Outside Tap Not Working on a New Build?
If your house is only a few years old, freezing usually isn't to blame — new-build outside taps tend to fail for installation reasons instead:
- Leftover jointing compound or PTFE swarf: debris from the original fit-out can lodge in the double check valve or tap seat and block flow completely.
- Flexible push-fit or "self-cutting" kits: many developers use small-bore flexible pipe rather than solid copper, and this kinks easily behind cupboards and stud walls.
- A valve fitted the wrong way round: an isolation valve or double check valve installed backwards can restrict or completely block flow in one direction.
Start with the double check valve test from Section 3 above. If water still won't flow once the tap and valve are removed, trace the pipe back from the outside tap to where it connects under the sink and look for kinks. It's also worth asking the developer's aftercare team or a WaterSafe-registered plumber to inspect it, since snagging issues like this are often covered under a new-build warranty.
6. The Dry Wall Test: Checking for Splits
The most dangerous fault is a split pipe hidden within the cavity wall. This happens when trapped water expands outward, splitting the copper sleeve without you noticing until the valve thaws out.
The 2-Minute Leak Check
- Step 1: Keep the outdoor tap closed but make sure its indoor isolation valve is turned fully On.
- Step 2: Go inside and check the plasterboard, brickwork, or floorboards around the point where the external pipe leaves the building.
- Step 3: Listen closely for a faint hissing sound or watch for a drop in your combi boiler's pressure gauge (if the feed branches off an internal utility node). If you see damp patches blooming on the wall, isolate the line instantly.
7. When to DIY and When to Call a Plumber
Most of the fixes on this page are well within reach for a confident homeowner with a couple of spanners. But there are three situations where it's safer, cheaper in the long run, and honestly less stressful to hand it to a professional:
- You've found damp or hissing inside the wall. A split behind plasterboard needs the wall opened up and the pipe re-run. Do the isolation and stopcock check to stop the flow, then call a WaterSafe-registered plumber.
- There's no dedicated isolation valve. If the only way to shut off the outside tap is the main house stopcock, fitting an inline valve now will save you every future call-out. It's a 20-minute job for a plumber and dramatically reduces your risk next winter.
- You'd need to solder copper pipe. If the fix involves cutting into pipework and making soldered joints, and you've never done it before, the cost of getting it wrong (a wall-cavity leak) is far higher than the plumber's fee.
Sections 1 through 4 above (isolation valve, thawing, double check valve, washer replacement) are all safely within DIY territory and rarely need a call-out.
8. Essential Maintenance Tools
| Product Image | Essential Tool | Why You Need It | Action |
|---|---|---|---|
|
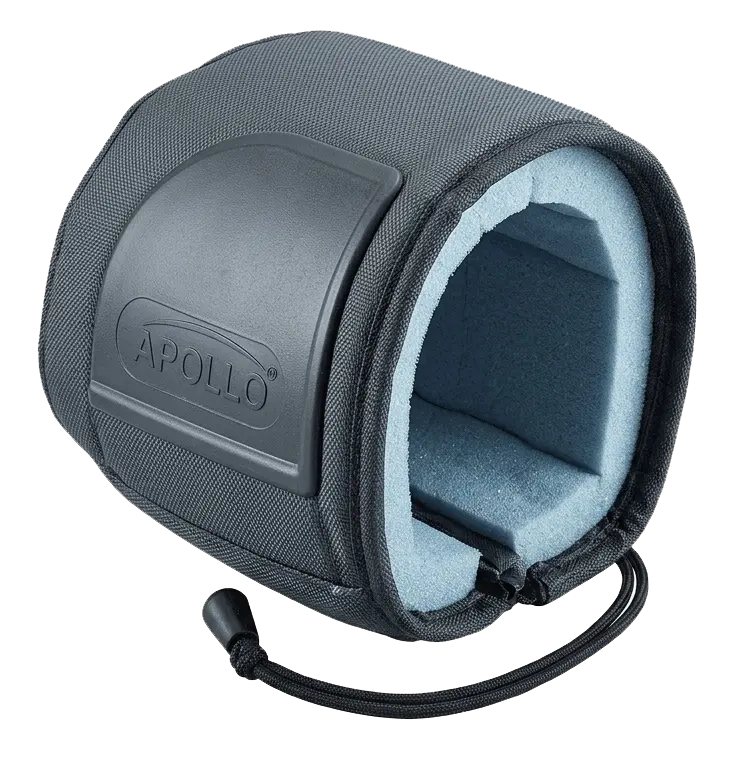
Insulated Tap Cover Jacket | Prevents sub-zero cold from freezing the brass assembly next winter. | View Guide |
|
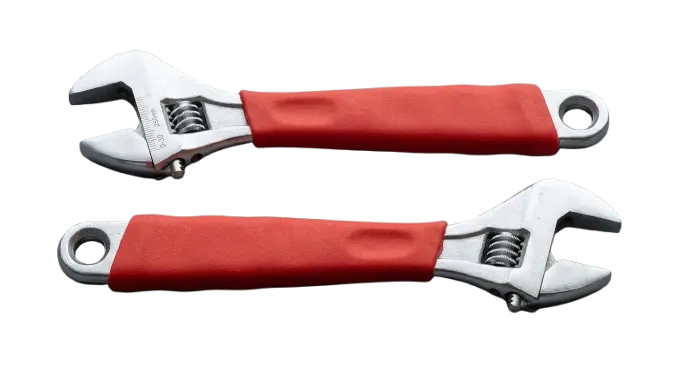
Adjustable Spanners (Pair) | One to hold the tap body steady, the other to safely unscrew the bonnet. | View Guide |
9. How Much Does It Cost to Fix or Replace an Outside Tap?
Most of the fixes above cost next to nothing if you tackle them yourself — a replacement washer or double check valve is only a few pounds. If you'd rather call a professional, UK plumbers generally charge within these ranges for outside tap work:
- DIY tap or valve replacement: roughly £6–£15 for a basic bib tap, or £30–£60 for a frost-resistant model.
- Professional like-for-like tap or valve replacement: around £60–£150, including a standard call-out and up to an hour's labour.
- Repairs involving opening up a wall, fitting a new isolation valve, or accessing hidden pipework: £150–£300 or more, depending on access and how much pipework needs replacing.
These are guide prices rather than a quote for your job — get two or three like-for-like quotes from local, WaterSafe-registered plumbers before booking anything beyond a simple tap swap.
10. Winter Proofing Your Outside Tap
To avoid going through this troubleshooting process again next spring, make a habit of draining down your external system every autumn:
- Isolate Early: Close the internal isolation valve as soon as the first overnight frost warnings appear in November.
- Drain the System: Go outside and open the garden tap fully. Leave it open. This lets any residual water drain out harmlessly rather than freezing inside the pipe.
- Fit a Thermal Cover: Slip an insulated tap cover jacket over the tap head to cushion it against sudden extreme temperature drops. It costs £3–£8 and pays for itself the first time it saves a call-out.
Questions & Answers
Real questions from homeowners — answered by our team.
Community Questions
Outside Tap FAQ
Why is water leaking from the tap handle when I turn it on?
This is usually due to a degraded gland packing washer or an unseated packing nut right behind the handle spindle. Tightening the packing nut slightly with a spanner often stops the weep; if not, the internal gland packing needs replacing. If it's dripping from the spout instead of the handle, our garden tap dripping or leaking guide covers that fault in full.
What is a double check valve, and does my outdoor tap need one?
Yes — under UK Water Regulations, every outdoor tap must have a double check valve fitted. This prevents stagnant hosepipe water or garden chemicals from being siphoned backward into your home's clean drinking water supply if mains pressure drops.
My outside tap isn't working but the stopcock is on — what next?
If both the main stopcock and any inline isolation valve are open, move on to the double check valve. It's the next most likely blockage point after winter, and it's cheap to replace whether it's built into the tap or fitted separately on the pipe inside.
How long does it take for a frozen outside tap to thaw?
Using gentle heat, such as a hot-water-soaked towel or a hairdryer on a low setting, a frozen tap and the first foot or so of pipe usually thaws within 15 to 30 minutes. Ice further back inside a wall cavity can take longer and is safer left to thaw naturally, or checked by a plumber, since forcing it risks revealing a hidden split.
Why is my new-build outside tap not working?
New-build outside taps usually fail because of installation debris, a kinked flexible supply pipe, or a double check valve fitted the wrong way round, rather than frost damage. Check the tap and valve first, then trace the pipe run for kinks before assuming it needs a full replacement.
Can I replace an outside tap myself without turning off the whole house water?
Yes, provided you have a working inline isolation valve on the indoor pipe feeding that specific tap. Simply close that single valve, open the outside tap to drain the remaining line, and replace the head unit safely.
Why does my tap vibrate or make a loud vibrating noise when open?
A loud vibrating or juddering sound is almost always caused by a loose internal tap washer or a worn-out jumper block spinning rapidly inside the brass housing as water rushes past it. Replacing the washer fixes the vibration.
How much does it cost to fix or replace an outside tap in the UK?
A DIY tap or valve replacement typically costs £6 to £60 for parts. A professional like-for-like swap usually costs £60 to £150 including call-out and labour, rising to £150 to £300 or more if pipework needs to be exposed or a new isolation valve fitted.
Can a frozen outside tap burst a pipe?
Yes — this is exactly how most winter burst pipes happen. Water expands by roughly 9% as it freezes, and if there is nowhere for it to expand into, the pressure splits the pipe or the tap body. The split often stays plugged by ice until the thaw, then leaks heavily. Fitting an insulated tap cover jacket and draining the tap in autumn is the cheapest way to prevent this.
How do I know if my outside pipe has burst?
Look for three signs: a damp patch or bubbling paint on the internal wall behind the tap, a faint hissing sound when the isolation valve is on but the outside tap is closed, and an unexplained drop in your combi boiler pressure or your water meter ticking over with no taps running. If you see any of these, close the main stopcock and call a plumber.
Should I leave my outside tap on in winter?
No. The safest approach is to close the internal isolation valve in autumn, open the outside tap fully to drain the line, and leave the outside tap in the open position all winter. That way there is no water sitting inside the tap or the exposed pipe stub to freeze in the first place.