Best Digital Multimeter for Home Electrics UK: Test Thermostats & Boiler Wiring
Is your thermostat wiring suspect, or are you not sure if your boiler is getting the right voltage? A digital multimeter is the one tool every UK homeowner should have. It takes the guesswork out of heating faults before you call an engineer.
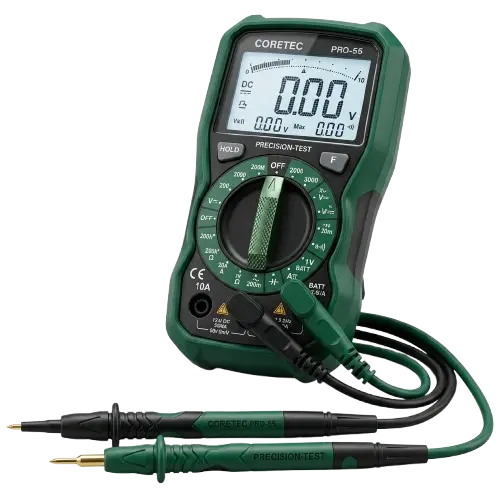
Why UK Homeowners Need a Multimeter
A digital multimeter (DMM) lets you safely measure voltage, resistance, and continuity — the three checks that diagnose most UK heating faults without touching the boiler itself.
- Voltage Check: Confirm your thermostat is receiving the correct 24V or 230V supply from the boiler.
- Continuity Test: Detect a broken wire in your thermostat cable or a blown fuse in your fuse box.
- Resistance Reading: Diagnose a failing NTC sensor or a burnt-out relay inside your heating controls.
Common Mistakes When Testing Heating Electrics
Using the wrong setting on your multimeter — or choosing an underpowered unit — is the most common reason DIY electrical checks go wrong.
Many smart thermostats run on DC. Switching to AC mode gives a false zero reading, leading you to wrongly condemn a working unit.
Basic £5 meters lack auto-ranging. On live UK mains (230V), selecting the wrong range can blow the meter's internal fuse or give a dangerous inaccurate reading.
Where to Buy a Digital Multimeter for Boiler & Thermostat Testing in the UK
A reliable digital multimeter for UK home heating diagnostics typically costs between £15 and £40. Buying from a trade retailer like Screwfix or Toolstation means same-day click-and-collect — useful when you need to diagnose a cold home quickly. Spending a little more on a quality unit can save you an £80–£120 Gas Safe engineer call-out fee.
All three models below support voltage testing (AC & DC), continuity checking, and resistance measurement — the three functions you need to diagnose thermostat wiring, blown fuses, and boiler control faults in UK homes.
| Retailer | Stock Status | Best For | Link |
|---|---|---|---|
| Screwfix | In Stock | Full-size meter with large display | View Product |
| Toolstation | In Stock | Pocket-sized with temperature probe | Check Price |
| Amazon UK | Available | Wide choice of auto-ranging meters | View on Amazon |
💡 UK Buying Tip: Screwfix and Toolstation both offer free click-and-collect from hundreds of UK branches — ideal if your heating has failed overnight and you need the tool first thing in the morning.
Advanced Guide: Using a Multimeter on UK Heating Controls
Before you start, switch off the circuit at your consumer unit and confirm it is dead using the continuity or voltage function. Never probe live 230V terminals unless your meter is rated CAT III or higher and you are confident doing so. A voltage detector pen is a quick first check before you touch anything.
🛠️ What You Will Need:
- ✅ Digital multimeter (auto-range preferred)
- ✅ Insulated test probes (supplied)
- ✅ VDE insulated screwdriver
- ✅ Torch or phone light
- ✅ Notepad to record readings
- ✅ Thermostat wiring diagram (from manual)
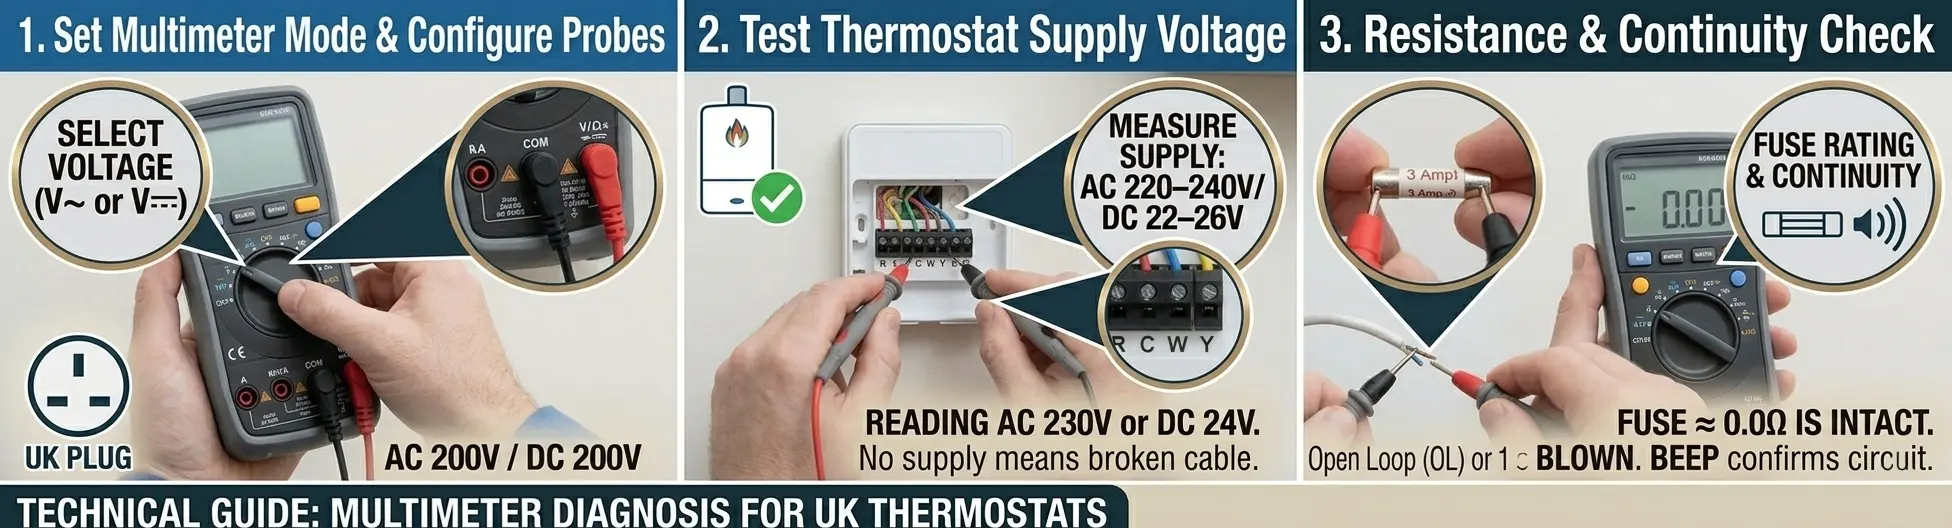
Fig 1: Testing the thermostat terminal block with a multimeter — place probes on the R and C terminals to check 24V supply.
1. Set the Correct Mode
Rotate the dial to DC Voltage (V—) for low-voltage smart thermostats (Hive, Nest, Tado), or AC Voltage (V~) for traditional wired UK room stats. Select the 200V range if your meter is not auto-ranging. Inserting the red probe into the V/Ω port and the black probe into the COM port is standard for both tests.
2. Test the Thermostat Supply Voltage
With the boiler switched on, carefully touch the red probe to the R terminal (or Live) and the black probe to the C terminal (or Neutral/Common) on your thermostat's terminal block. A healthy wired UK stat should read 220–240V AC. A smart thermostat's 24V common wiring should read 22–26V DC. A reading of 0V means the supply cable is broken or the boiler relay has failed. If you suspect the stat itself, see our thermostat not working guide.
3. Continuity Test on the Thermostat Cable
Disconnect the thermostat cable from both ends. Set your meter to the continuity/beep mode (the diode symbol). Touch one probe to each end of the same wire. A continuous beep confirms an unbroken circuit. Silence means the wire has a break — common in cables that run through door frames or behind skirting boards in UK homes.
4. Check the Boiler Fuse with Resistance Mode
Locate the fuse in your boiler's external fused spur (usually a 3A or 5A cartridge fuse). Set your meter to resistance (Ω) and place a probe on each end of the fuse. A reading close to 0Ω means the fuse is intact. A reading of "OL" or 1 (open loop) means the fuse has blown and needs replacing like-for-like — always match the original amperage rating printed on the fuse body. If your fuse box keeps tripping instead, see our fuse box tripping guide.
💡 Expert Troubleshooting: Unusual Readings Explained
If your readings don't match expected values, use these quick checks before calling an engineer.
- Fluctuating Voltage: A voltage that jumps between 0V and supply voltage usually points to a loose connection at the terminal block, not a failed component. Tighten the screw terminals and re-test.
- "OL" on Resistance Mode: If you see OL when testing a wire (not a fuse), the wire is broken. Do not attempt to splice heating control wires yourself — replace the full cable run.
- Correct Voltage but No Heat: If the thermostat is receiving the right supply voltage but still not triggering the boiler, the fault is most likely a failed relay inside the boiler's PCB — this requires a Gas Safe registered engineer.
⚠️ Important: A digital multimeter is a diagnostic tool only. If you discover a wiring fault beyond a simple fuse replacement, contact a qualified electrician or Gas Safe engineer. Do not attempt to repair boiler wiring yourself.
Frequently Asked Questions
What multimeter setting do I use to test a thermostat?
Use DC voltage for low-voltage smart thermostats such as Hive, Nest and Tado, and AC voltage for traditional wired UK room stats. Using AC mode on a DC circuit gives a false zero reading and can make a working thermostat look faulty.
What voltage should a UK thermostat read?
A traditional mains-wired UK room thermostat should read around 220 to 240V AC across its supply terminals. A low-voltage smart thermostat's common wiring should read around 22 to 26V DC. A reading of 0V points to a broken supply cable or a failed boiler relay.
How do I test a boiler fuse with a multimeter?
Switch off and isolate the circuit, remove the cartridge fuse from the fused spur, set the meter to resistance, and touch a probe to each end. A reading near 0 ohms means the fuse is good; a reading of OL or 1 means it has blown and must be replaced with the same amperage.
What does "OL" mean on a multimeter?
OL stands for "over limit" (or open loop). On resistance or continuity mode it means there is no complete circuit — so a wire is broken or a fuse has blown. On voltage mode it can mean the reading exceeds the selected range.
Do I need an auto-ranging multimeter?
Auto-ranging is recommended for home use because it selects the correct range automatically, reducing the risk of choosing the wrong range on live mains and blowing the meter's fuse or getting an inaccurate reading. For mains work, also choose a meter rated CAT III or higher.
Is it safe to test mains wiring with a multimeter?
Only with a meter rated CAT III or higher, and only if you are confident and competent. Wherever possible, switch off and isolate the circuit at the consumer unit and confirm it is dead first. A multimeter is a diagnostic tool; any wiring fault beyond a simple fuse change should go to a qualified electrician or Gas Safe engineer.